


Celebrating International Women’s Day.
To celebrate International Women’s Day 2018, we here at Blok would like to honor and thank a few female photographers for constantly inspiring us with their amazing creativity, dedication, and vision!

Annie Leibovitz.

Mary Ellen Mark.

Diane Arbus.

Dorothea Lange.

Vivian Maier.

How To Enhance Portraits Using A Reflector.
In photography, lighting is the single most important tool. As photographers, we constantly chase light and literally cannot survive without it. Both inside and outside of the studio, one of the most important (and often underrated tools) you should have on hand is a reflector. It can be used to diffuse, bounce, or flag natural and artificial light. In this video, Aaron Nace of Phlearn provides tips on the benefits of using reflectors and why this is an especially important tool to have in every photographer's bag.
- Gold Reflector – The gold reflector will bounce a lot of light and give the light a “gold” color. This can be perfect for bouncing light during a sunset, or when you want to add some warmth to a portrait. In our experience, the gold reflector is used less than silver or white.
- Silver Reflector – The silver reflector will bounce a lot of light and keep the light color neutral. This is great when you need more light in a portrait or when your reflector has to be far from your subject. Be careful you don’t blind your subject with light, as the reflection can be quite strong.
- White Reflector – The white reflector will bounce a small amount of light with a neutral color. These reflectors are great because they produce softer light than gold or silver.
- Black Reflector – Black reflectors are used to add “negative fill.” Use the black reflector to reduce the amount of light around your subject. Black reflectors are generally used with portraits on the left and right side of the subject to give them more depth.
- Diffusion – Diffusion panels are meant to diffuse or soften light. Generally, you will shine a light through a diffusion panel and then the light will hit your subject.
These panels will make the light softer and larger, but they will also reduce the amount of light that hits your subject.
Three Lighting Kits To Consider.
Purchasing a lighting kit can be a daunting task, especially for your first kit ever. Many photographers have to consider the type of work and typical shooting scenarios that the kit would work best for. The overall cost for a lighting kit can be very expensive, but you can definitely find alternatives.
Photographer and director, Joey L gives an in-depth review of three lighting kits that can be used in the studio or on location. The review covers the brands Paul C. Buff, Profoto, and Broncolor. He also goes over the essential items in each kit.
This review is a great starting point for anyone looking to purchase or upgrade a current kit. Our Lighting 101 Class covers this topic in-depth. If you're interested in learning more go sign up!

Capture One 11 Is Now Here!
Here at Blok Studio, we are firm believers in shooting tethered. We wrote an article about the benefits of tethering that you can find HERE. Outside of having the proper hardware to tether, it's equally important to have the software for your raw capture and that's where this Capture One comes into your workflow. There are definitely other options for tethering such as Lightroom, but here at Blok, we use Capture One exclusively. Recently, Phase One did an overhaul on their latest version to really push this powerful software to new heights. The video included gives a great overview of the new features so you can take full advantage of this tool.

Learn how to be a director with Thomas Ingersoll.
This week our Blok EDU instructor, Thomas Ingersoll, gives some vital information on how to make sure you're an effective director! His post takes you on a step-by-step process from meeting the client(s), to delivering the final images. You can check the entire post HERE!

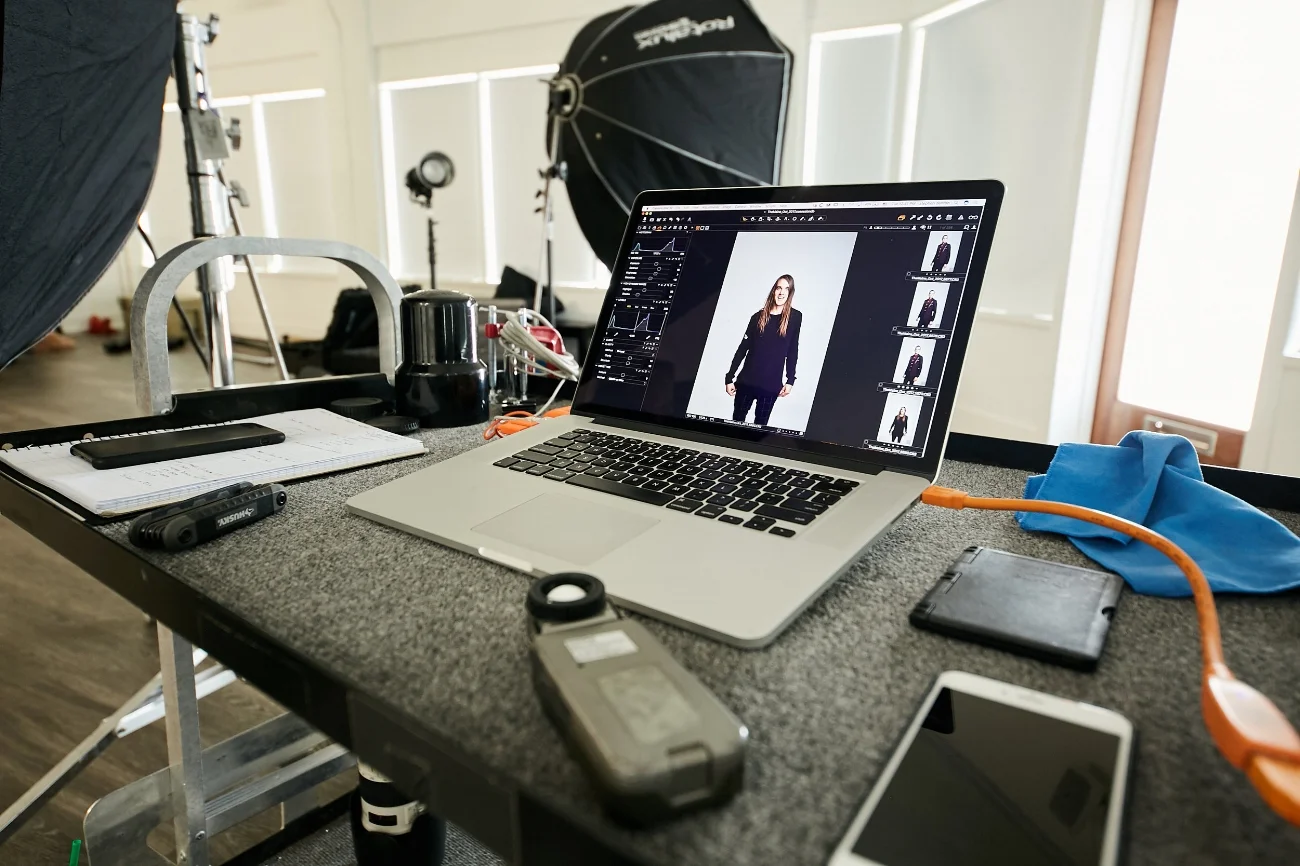
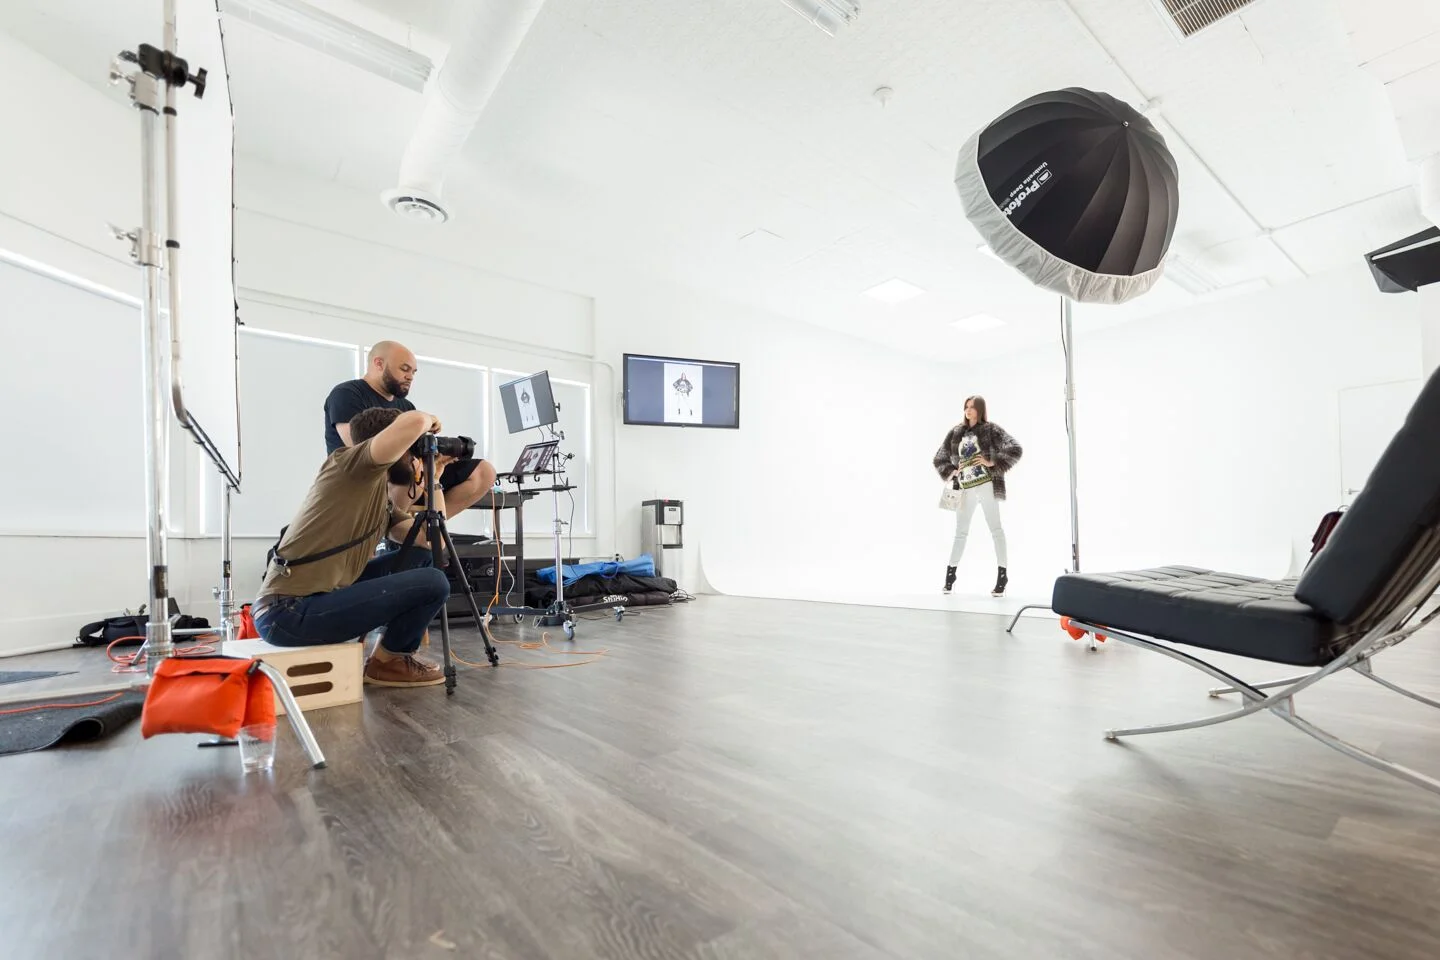
Introduction To Shooting Tethered.

If you are a photographer, you have had the experience of taking a photo, looking at it on the back of the camera and being happy that you nailed the shot. But then you get home, upload your images, and realize that it’s a bit out of focus, or simply notice objects in the background that may be distracting. Shooting tethered to a computer can alleviate problems like this, as well as provide other added benefits.
It Could Save Time.
The ability to see exactly what you're getting from your raw image ultimately saves you time. You can confirm when you have the "shot." When shooting tethered, there's a good chance you are taking fewer photos which also less to cull through.
Everyone On The Same Accord.
When working with a team of people tethering is crucial. When I shoot portrait work, I often need a make-up artist, hair stylist, and a wardrobe stylist to produce my vision. Allowing my team to see exactly what's being captured gives everyone the confidence that we are headed in the same direction. This also provides the opportunity for my team to catch things I may have missed ( hair in the face, pieces of a garment that may need to be tucked, touching up the make-up). The model can also see what poses work best and you can give a bit more direction.
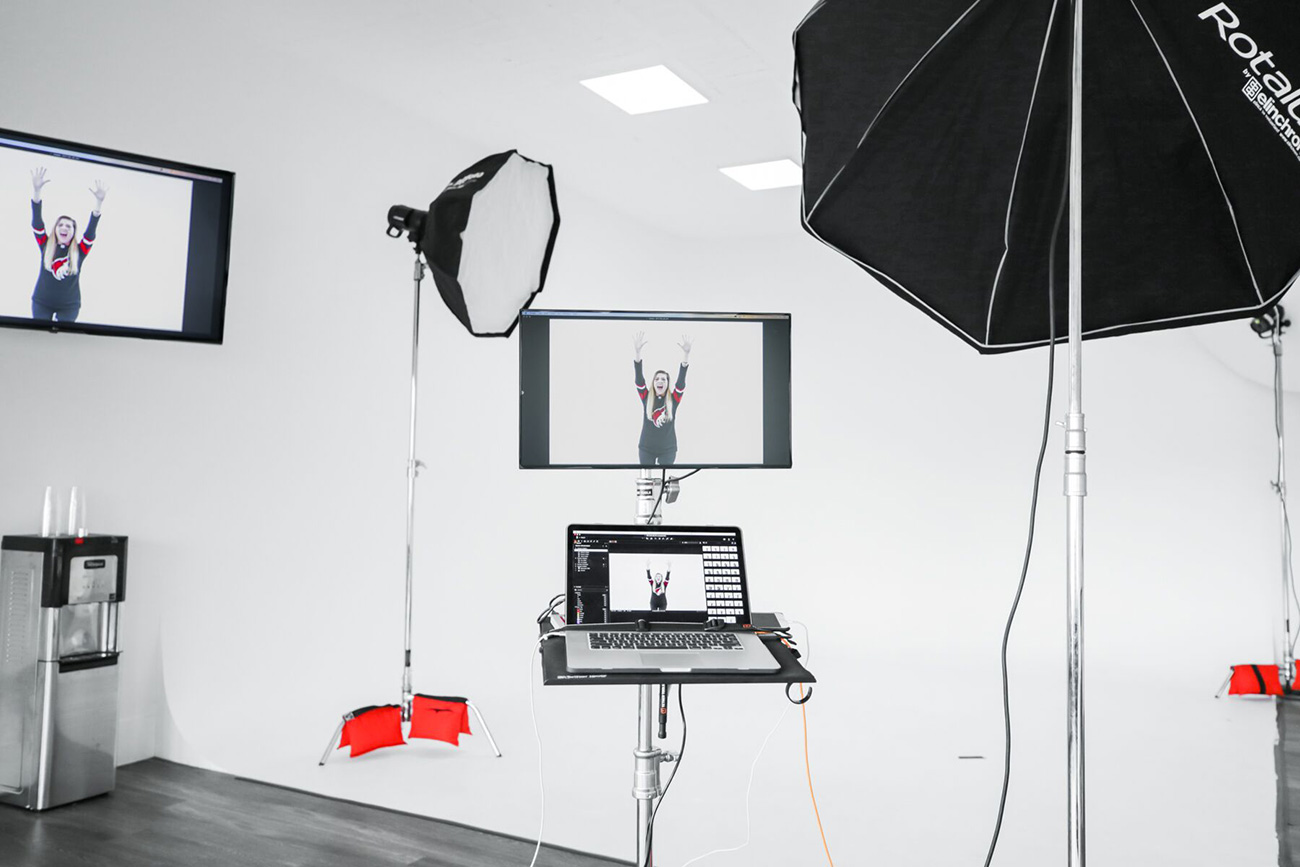
3.2″ LCD Screen vs 15″ Retina Screen
The tiny little LCD screen on the back of the camera is about 1 megapixel. Most cameras shoot somewhere between 20-50MP. That’s a lot of detail you aren’t seeing. Sure, it's better than nothing at all, but it gives a minimal view of the overall image. The tonal range of the camera’s LCD screen isn’t incredibly accurate either, especially in the shadows and highlights. The exact balance of light, critical focus, distracting elements, blinking eyes, etc., are all difficult to spot quickly during a fast-paced shoot on the on-camera screen. Add in environmental factors like bright sunlight and it can become a guessing game.
Visit our friends over at TetherTools to get started on tethering!

Why You Should Be Using A Tripod.
Thomas Ingersoll at Blok Studio's Pierce location.
I'll admit when I started taking photographs I thought tripods were cumbersome. I wanted to move freely while shooting and initially felt tripods would slow down my workflow. Being that photography (Camera, lenses, accessories) can be very expensive, especially when you first start out, I couldn't wrap my mind around spending hundreds of dollars on a tripod. I did what most newbies would do and purchased a cheap tripod that had decent reviews on Amazon. It wasn't long after as my kit grew that I started to realize the importance of having a GOOD tripod. Think about it - you're putting expensive camera gear that you spent your hard earned money on. Outside of making sure you can set your camera up and walk away with confidence, here are a few other benefits for using a tripod.
Low Light Situations.
Tripods are an absolute necessity in low light situations. When you find yourself in a low light situation, you will need to reduce the shutter speed in order to increase light. Unfortunately, reducing the shutter speed means that your camera will be susceptible to camera shake. To ensure that you avoid the blur that may be introduced by your hand movement, a tripod will be essential.
Landscapes.
Landscape photography is one of the most popular types of photography. However, this type of photography typically requires that you use an aperture of at least f/8 and up to f/16 for most of your shots in order to ensure you achieve a wide depth of field that will put everything into clear focus. When you use these aperture settings, they narrow the amount of light coming in. To correct this, you will need either to increase the ISO or reduce the shutter speed so you can get the right exposure for the shot. Be aware that increasing ISO will introduce noise to the image so a good option will be to reduce the shutter speed. Placing your camera on a tripod will ensure you are getting the sharpest images possible by avoiding camera shake.
MACRO PHOTOGRAPHY.
As a food and cocktail photographer, I often take photos that are in close range, any movement in the camera is amplified and much harder to control when holding in your hand. When using my favorite lens the Canon 100mm 2.8 L the depth of field is very thin at its widest apertures, so it’s helpful to use narrower apertures — meaning your shutter speed goes down. In most cases, a tripod is essential in food photography to keep your image in focus and your aperture closed down enough that the whole subject is sharp.
Why You Should Start Attending Photography Workshops In 2017.

Make New Friends.
Photography is an activity often associated with independent initiative, but the rewards to be gained from participating in a workshop are many. The energy and dynamics created when you bring together a group of like minded individuals with a common goal. There are the many opportunities to share knowledge and experience that may even spark new ideas. A group of people working together to build something special promotes camaraderie. You often leave workshops with a group of new friends.
Learn from an expert while developing your own style.
A good workshop leader will ensure that every participant gets the level of support they need and will be on hand to offer help as needed. An experienced instructor will help you master technical skills while providing ample time for participants to explore their own vision. With expert guidance, your creative insight becomes keen, allowing you to develop your own personal style.
Get Inspired. Be Inspired. Inspire Others.
It can be difficult at times to stay motivated and inspired to go out shooting on a regular basis. However, we need to shoot on a regular basis to improve our photography. It's a lot like exercise for our bodies. Getting into, and staying in, some kind of routine is important. Missing a day or two here and there isn't a big deal, but if a day or two turns into a week or two, then a month or two, we lose a lot of the physical fitness (or photography fitness, as the case may be) that we've worked so hard to build. Workshops can definitely help get the creative juices flowing! That same momentum will inspire you to improve your overall photography skills and create new projects.
You can find all the updates on our workshops and education classes HERE!

5 Ways To Get Inspired!

Photo By: Matt Martian
As creatives, we are constantly seeking inspiration to continue the work we do. Occasionally, we all run into that day where the ideas just aren’t flowing how you’d like them to. These 5 tips are simply tools that can help you when you need them or even support them in your current day-to-day.
1.) Take a trip.
Taking a trip could mean visiting a new place, such as coffee shop you’ve been meaning to check out or even visiting a new city. The trip is less about the distance and more about the experience. If you’re driving to a location, you may even want to take a new route to your destination. My personal favorite is to take a long walk around my neighborhood. Fresh air and new surroundings typically incite inspiration.
2.) Meditate.
Meditation is a great way to clear the mind and allow new ideas to flow through seamlessly. Often as creatives, we are constantly pushing the limits of our mind and it’s very important to reset your thoughts in a proper manner. I’ve personally picked up the practice of mindfulness which has become the cornerstone of my day. You can find a very helpful app called HeadSpace HERE.
3.) Create a vision board.
Vision boards are a great way to organize current ideas and even spark new ones. You can create a vision board in your workspace by simply printing or drawing items/people/places that inspire you. If you’re like myself who prefers a digital vision board, Pinterest is a great place to create a digital vision board for on-the-go inspiration.
4.) Exercise.
There are many studies that support exercise on a daily basis can improve overall creativity. Having this creative avenue often leads to inspiration. Exercise also creates a great platform for problem-solving. If you are going through a bit of a creative rut, exercise is a great place to start. If you need an extra push to get active, reach out to a friend! Group fitness is a great way to keep yourself motivated.
5.) Surround yourself with other creative people.
They often say, "You are the sum of who you spend your time with”. It’s important that you are directly involved with people who lift you, inspire you, and motivate you to do and be more. When you’re surrounded by creative people, you’re surrounded by passionate people, which ultimately will inspire you to create! This sense of community makes creative challenges much more manageable. You’ll have others who can show empathy and remind you that you are not alone.
What is your favorite light modifier?

As part of our recent series, we invited our community to answer the question, 'What is your favorite portrait lens'. We received so many insightful views that we are back with another question! This week we're asking, 'What is your favorite light modifier?’. Leave your favorites down below! Happy shooting!